|
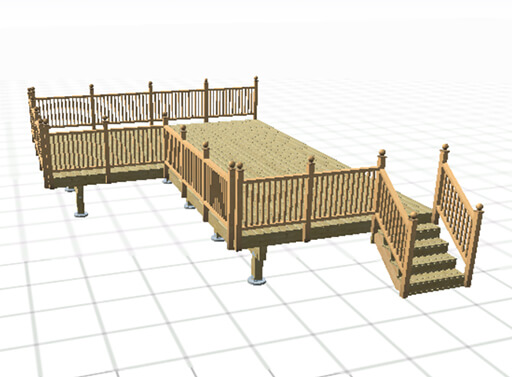
Step 1: Client Consultation and Design Phase We collaborate with our clients and designer to create a design that meets their aesthetic, functional, and budgetary needs. Our designer inspects the outdoor space to determine the best size, shape, and features including benches, lighting, and firepits if desired. We'll discuss style preferences, material preferences, railings and accessories to establish a preliminary design. Consider built-in features like benches, planters, or ambiance lighting. Finally, we'll build an estimate based on the all the design decisions. |
|
|
Step 2: Permitting and Engineering Approval We have experience collecting the necessary approvals for our clients. We check zoning laws, setback requirements, and height restrictions for freestanding decks. We use our home design tools to create detailed construction drawings, including foundation plans, framing, and material specifications. Then, our engineer alters our plans to meet load-bearing requirements and confirm deck and railing heights.With our plans in hand with a the engineer's stamp of approval. We'll apply for permits from the local building department for review and address any revisions requested by the permitting authority. |

|
|
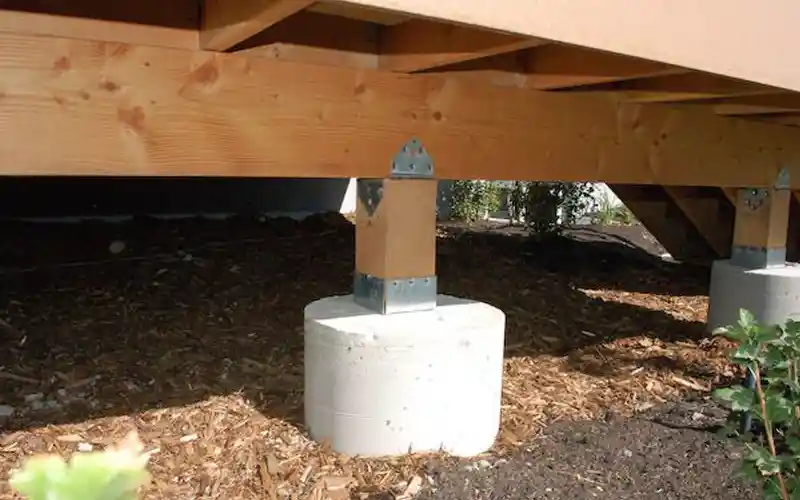
Step 3: Layout and Footings Using careful measurements, stakes and string, we outline the deck’s footprint based on the design plan. Dig holes for concrete footings below the frost line (typically 18–36 inches down) using the proper spacing a Ensure proper spacing for footings (usually 6–8 feet apart, depending on deck size and load requirements). Our designer inspects the outdoor space to determine the best size, shape, and features including benches, lighting, and firepits if desired. We'll discuss style preferences and material preferences and build an estimate based on the all the design decisions. |
|
|
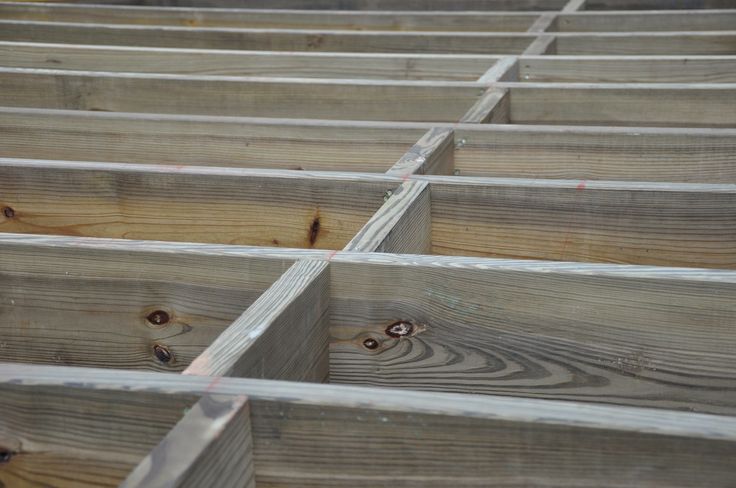
Step 4: Framing A stable deck is build from the ground up. Framing starts with bolting the posts into place. Then we secure the perimeter beams to the posts with large bolts and add angled support boards to help stabilize the beams. Marking out where the joists go can depend on how wide and heavy the deck will be. We hang the joists and secure them with joist hangers to prevent twisting. |
|
|
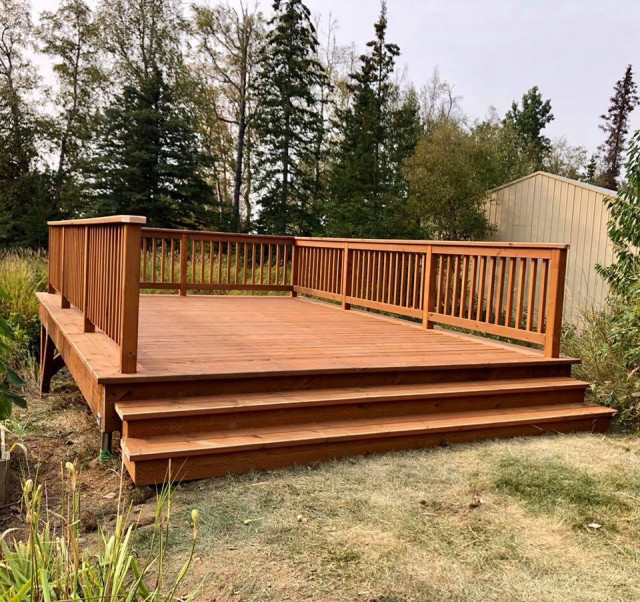
Step 4: Install Decking Before adding the decking, we always apply joist tape to protect the framing from moisture. Joist tape gives decks a significantly longer lifetime. We install at one edge and work across, ensuring consistent gaps (1/8–1/4 inch) for drainage and expansion. Use hidden fasteners (e.g., Camo or Cortex systems) for a clean, screw-free look.For hardwood, pre-drill holes to prevent splitting, and use stainless steel screws. Cut boards to fit around posts or custom features, maintaining a precise fit and lay the decking surface to achieve a polished, high-end finish. Optionally, we can incorporate high-end design elements like picture framing (border around the deck), herringbone, or diagonal patterns, using contrasting colors or materials for visual impact. |
|
|
(804) 878-2518 basedhomeimprovement@gmail.com Locations: Virginia Beach, Norfolk, Chesapeake |
© 2025 Based Home Improvement LLC |